Tutorials — POS Cart Attributes setup video & screenshots
Walkthrough videos and visuals for POS Cart Attributes.
Overview
Section titled “Overview”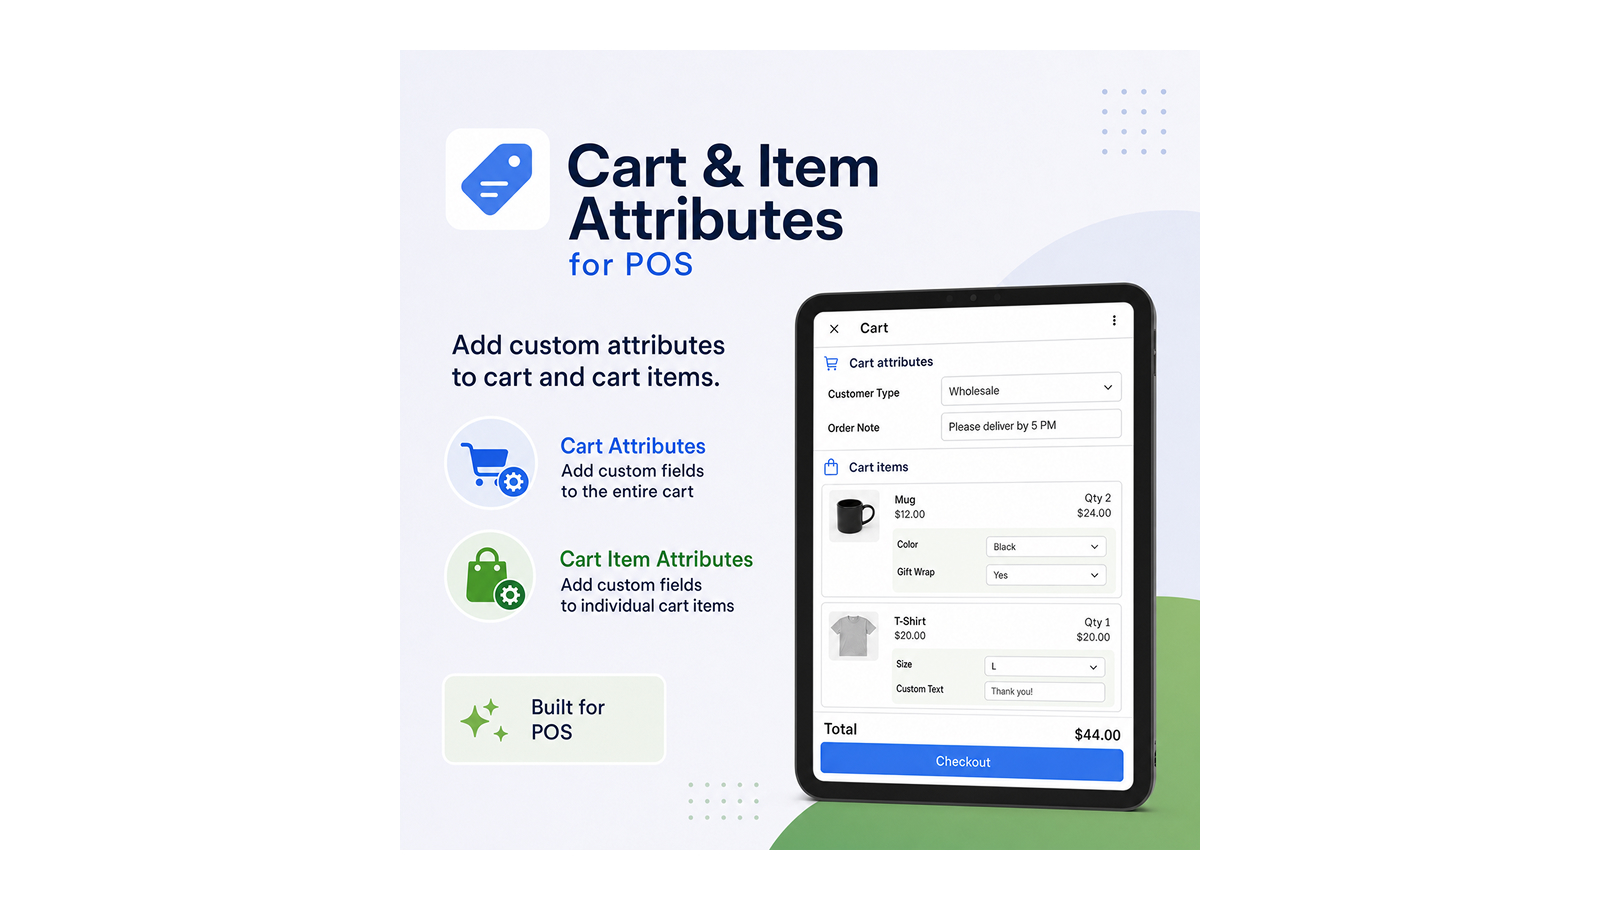
Capture cart-level and line-item attributes from Point of Sale. Admin defines allowed keys in Shop metafields; staff pick a key and enter a value at checkout.
The app is $4/month with a 7-day free trial. Install from the Shopify App Store before following the steps below.
Create Shop metafields
Section titled “Create Shop metafields”The app reads two Shop metafield lists. Create both under Settings → Custom data → Shop (or Shop metafields).
Step 1 — Create cart-level key definition (pos_cart_attr.keys)
Section titled “Step 1 — Create cart-level key definition (pos_cart_attr.keys)”Add a new Shop metafield definition:
- Name:
pos_cart_attr.keys - Type: List → Single line text
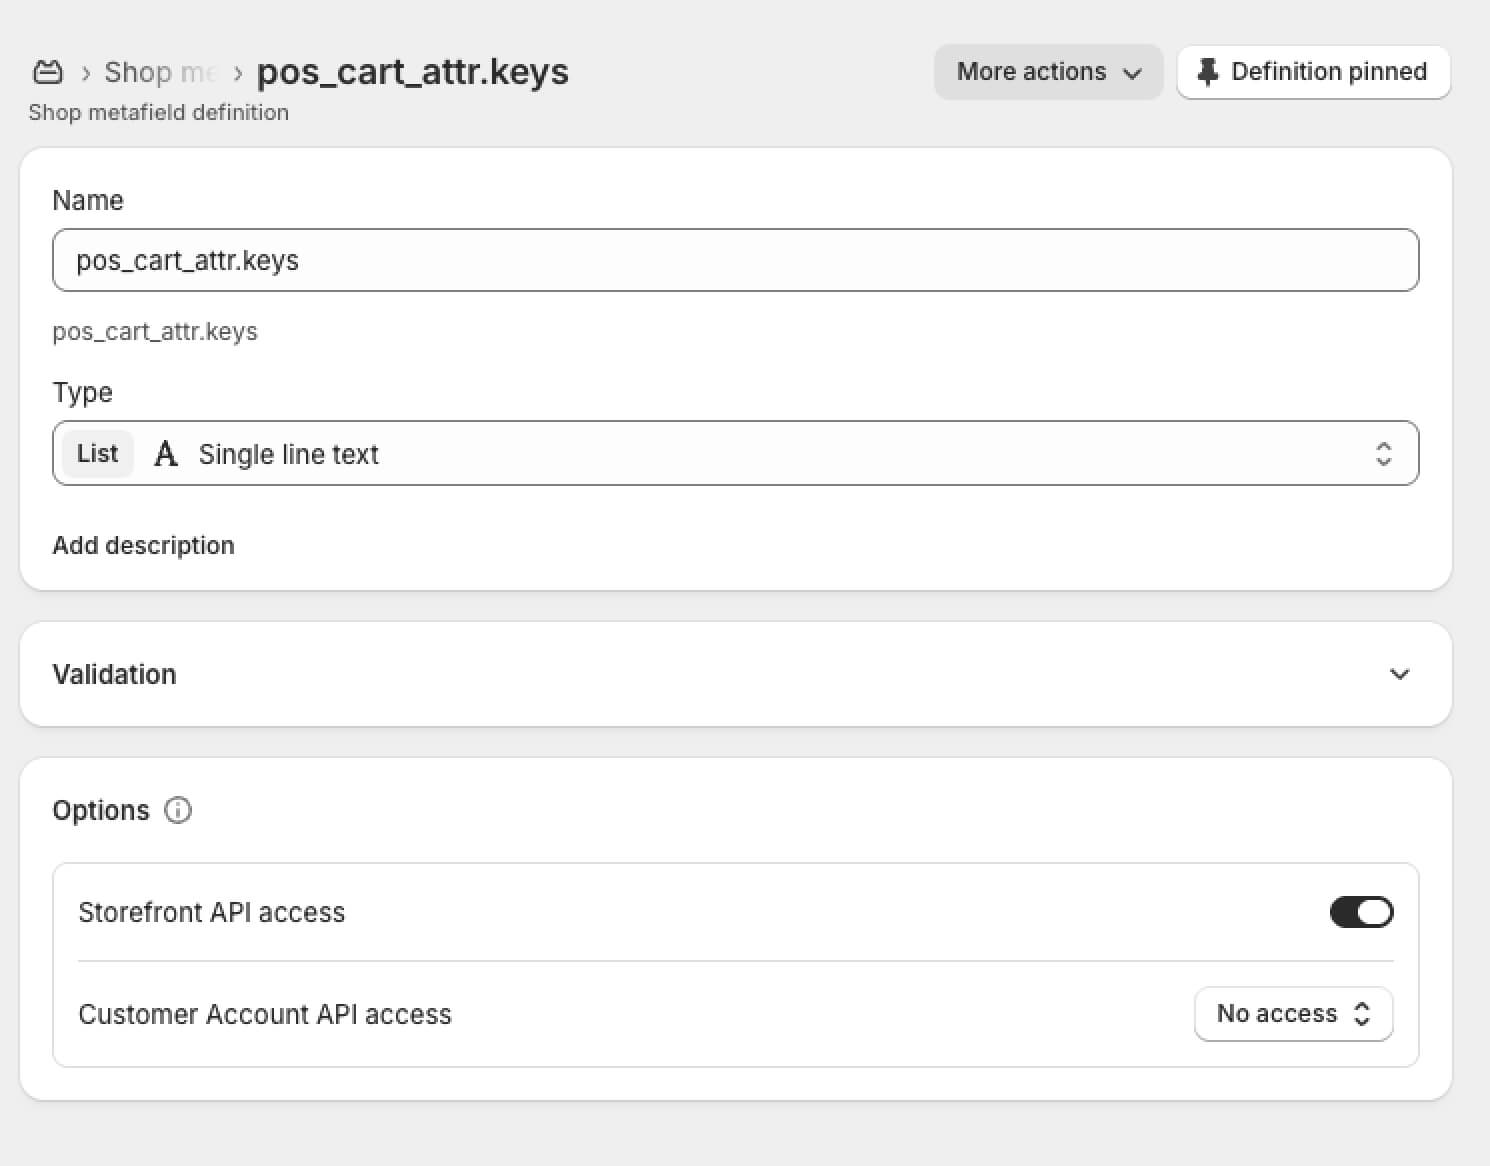
Step 2 — Add cart-level key values
Section titled “Step 2 — Add cart-level key values”Open Shop metafields, search for pos_cart_attr.keys, and add one row per allowed cart-level key. Each row becomes an option in the smart-grid tile modal.
Example: Staff, Sale type
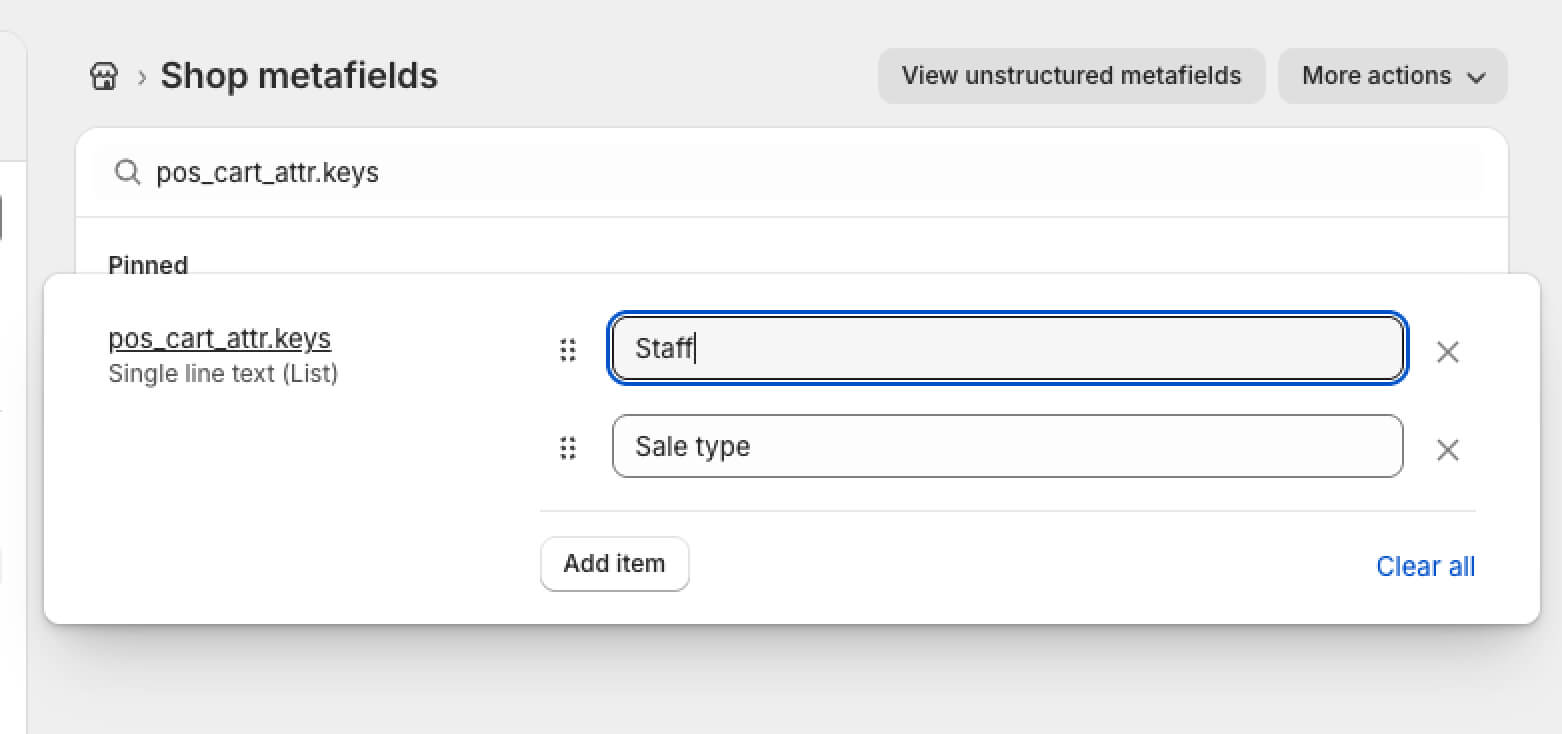
Step 3 — Create line-item key definition (pos_cart_attr.item_keys)
Section titled “Step 3 — Create line-item key definition (pos_cart_attr.item_keys)”Add a second Shop metafield definition:
- Name:
pos_cart_attr.item_keys - Type: List → Single line text
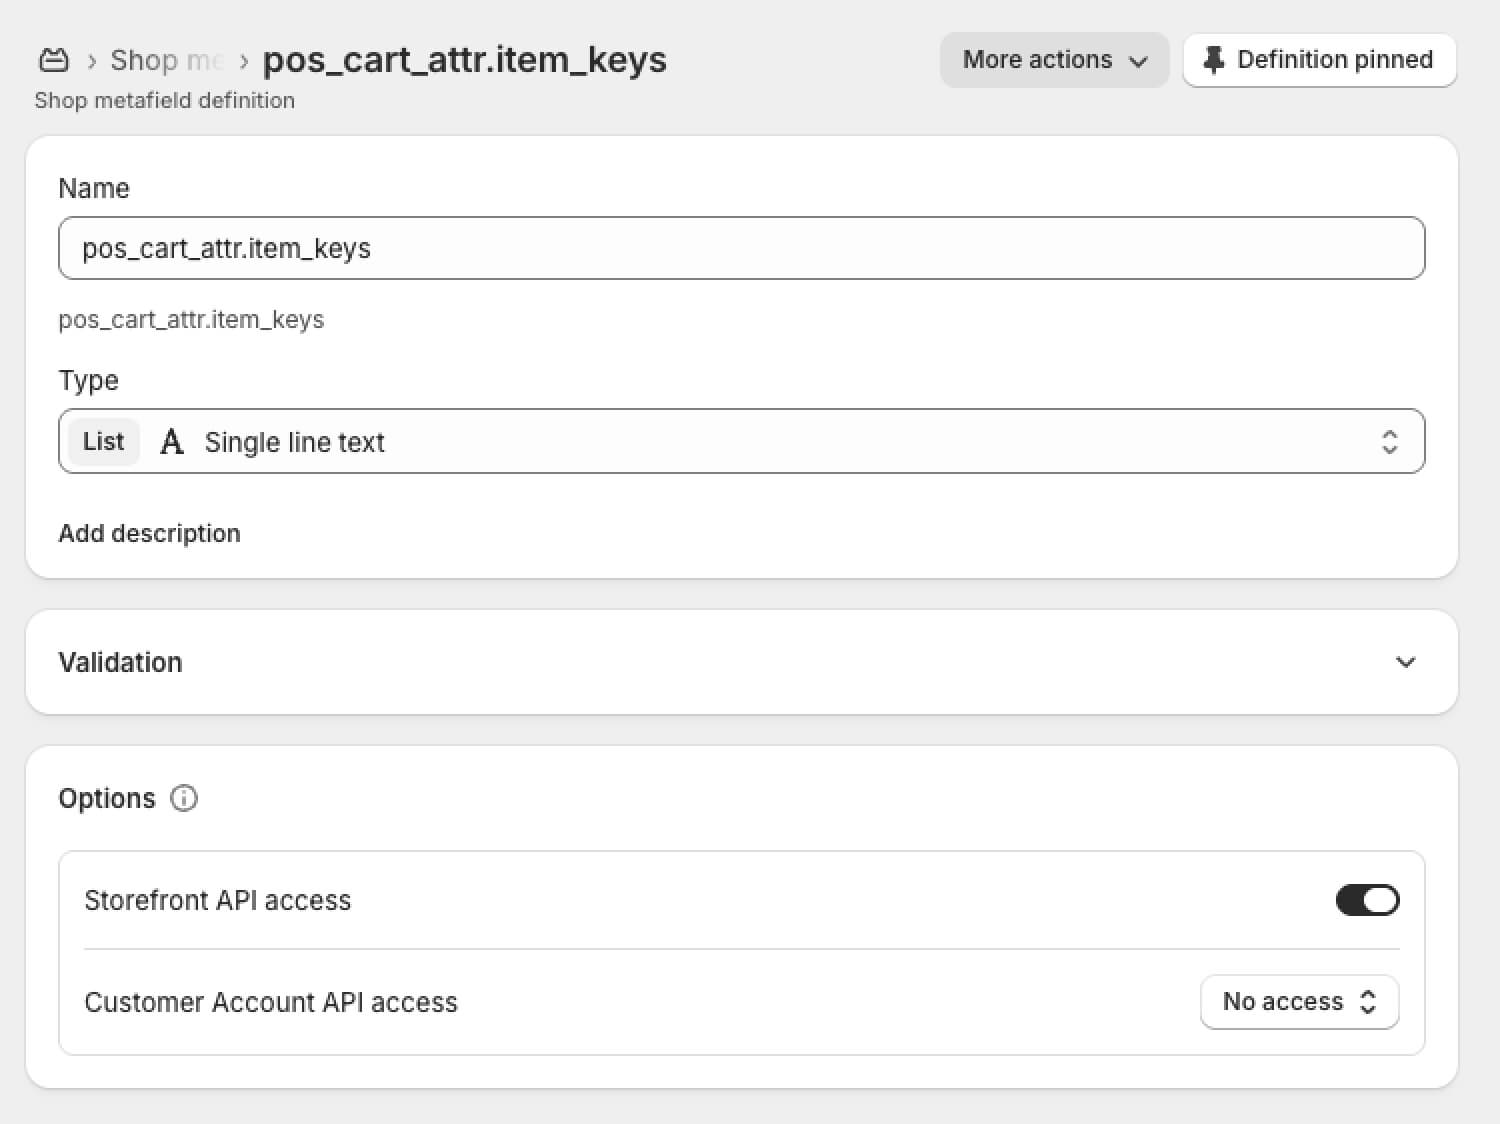
Step 4 — Add line-item key values
Section titled “Step 4 — Add line-item key values”Search for pos_cart_attr.item_keys and add one row per allowed line-item key. Each row becomes an option in the Update cart item attribute modal.
Example: S/N, Warranty
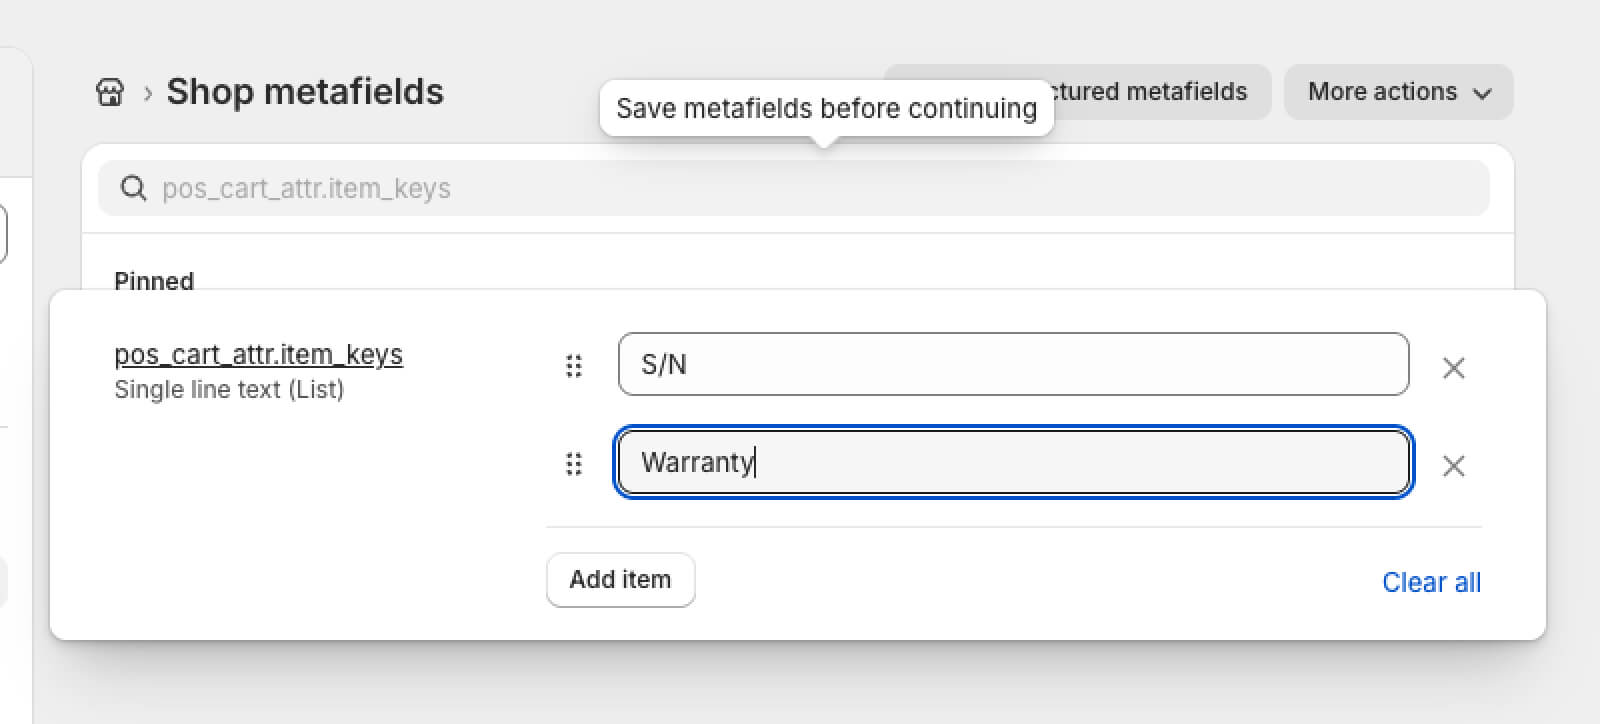
The namespace and key must match exactly. Changes are read live by POS — no app redeploy needed when you edit the lists.
Enable the app and add tiles
Section titled “Enable the app and add tiles”Step 5 — Enable POS Cart Attributes
Section titled “Step 5 — Enable POS Cart Attributes”In admin, go to Point of Sale and open the POS editor. Under Apps, find POS Cart Attributes and turn the app on. This enables the extension on your POS devices.
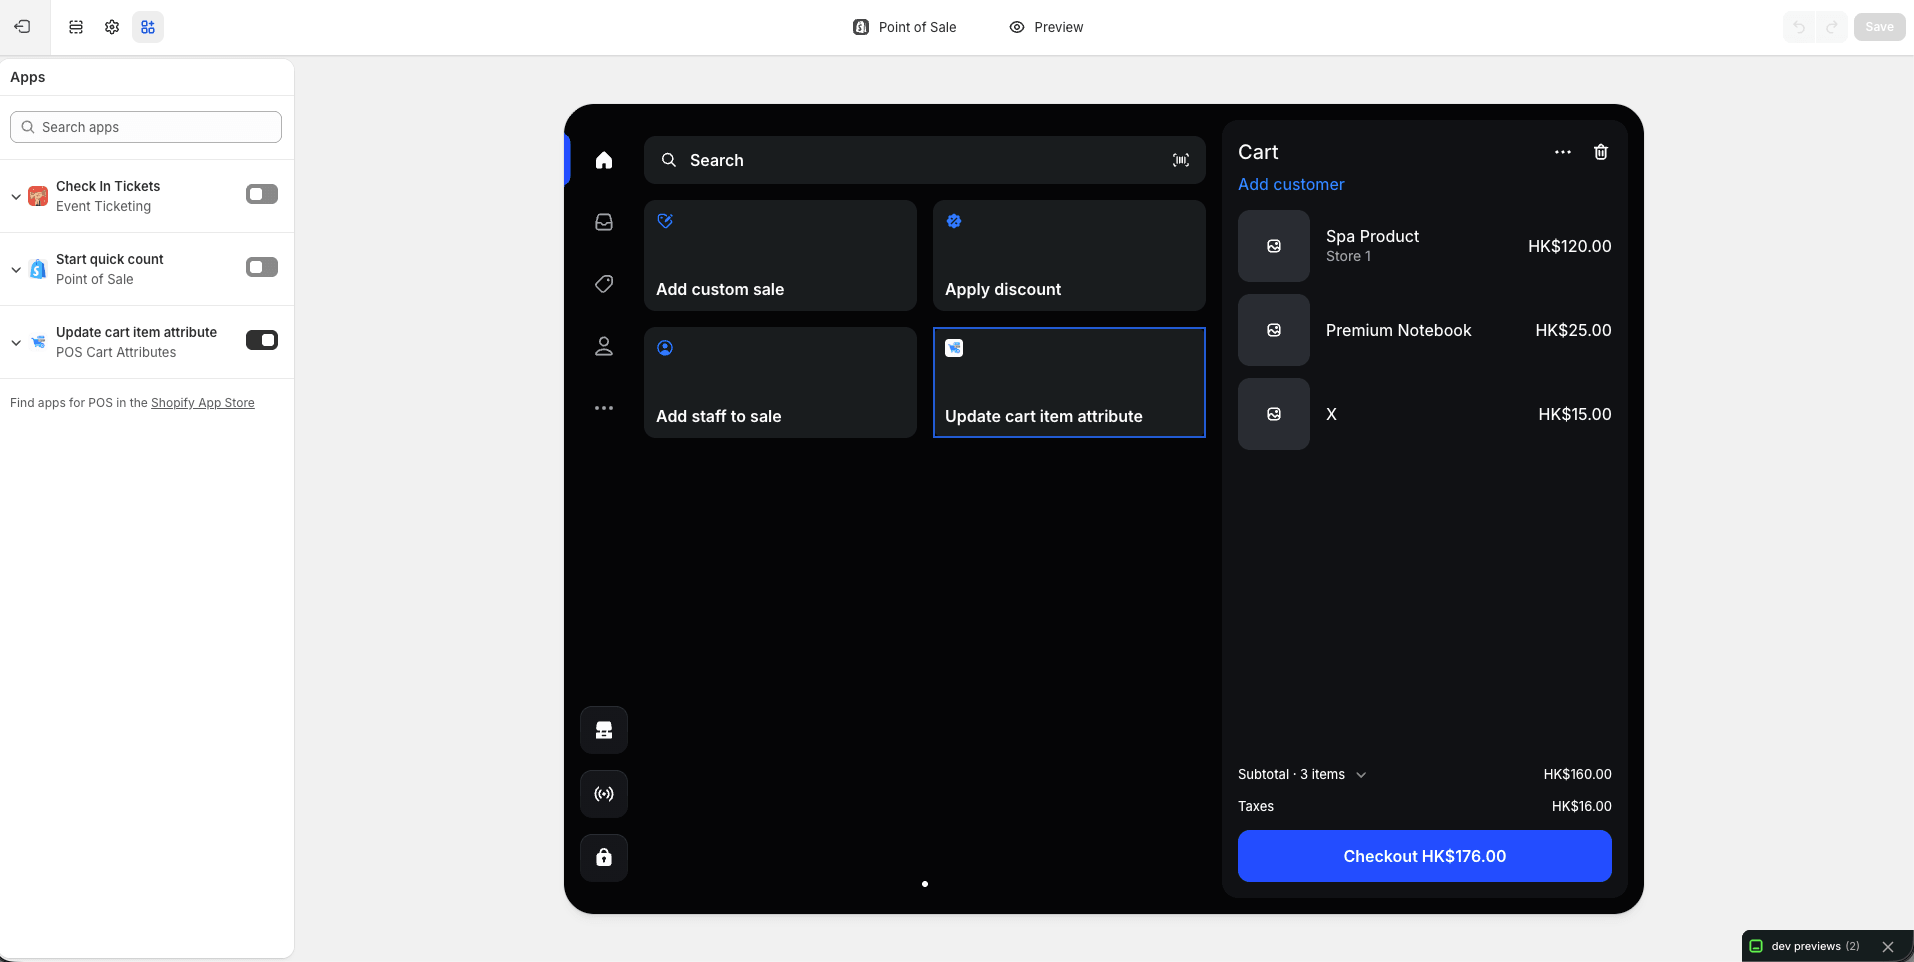
Step 6 — Add tiles to the smart grid
Section titled “Step 6 — Add tiles to the smart grid”Still in the POS editor, open your Smart grid template. Tap Add tile, then add the app tiles you need — e.g. Cart Attribute for order-level attributes, or Update cart item attribute if shown on your grid.
Drag tiles to arrange them, then Save the layout.
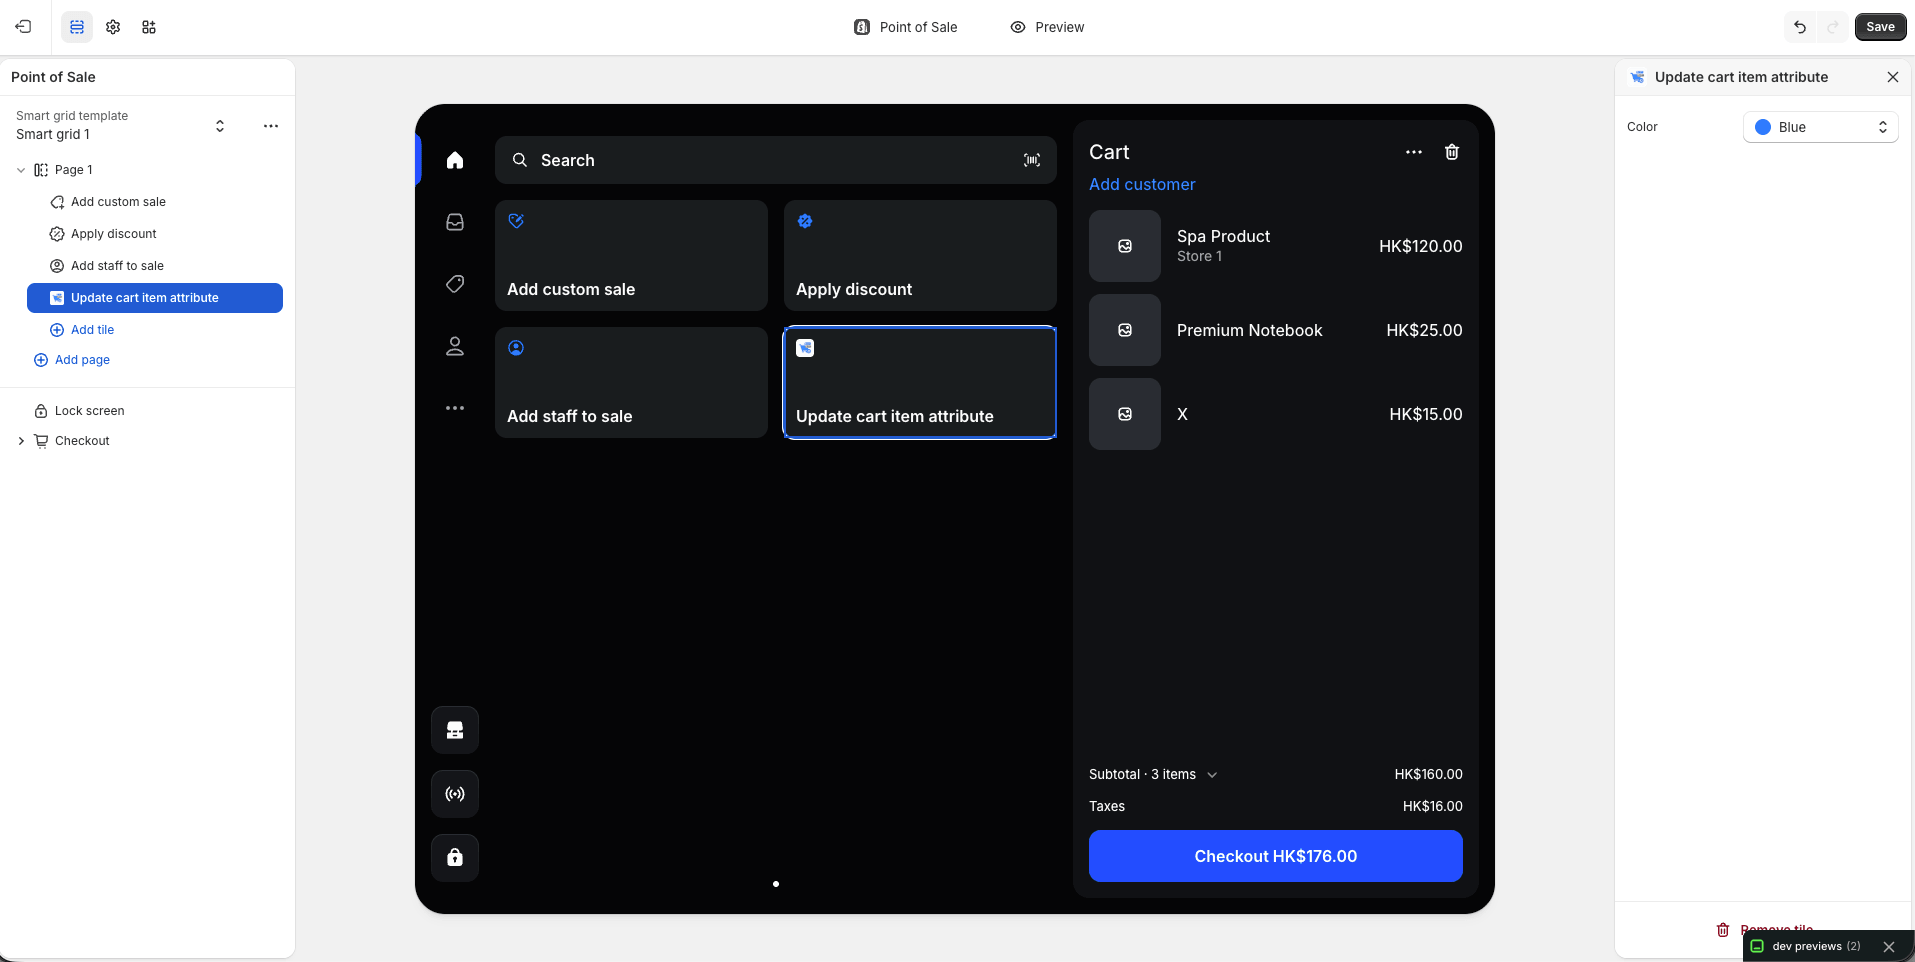
The Update cart item attribute action is also available from each cart line item’s ••• menu during a sale — you do not need a smart-grid tile for per-item attributes, but enabling the app is required for both flows.
Using the app at the register
Section titled “Using the app at the register”After setup, staff use two POS surfaces:
| Flow | Where | Example keys |
|---|---|---|
| Cart-level | Smart-grid Cart Attribute tile | Staff, Sale type |
| Line-item | Cart → line item → Update cart item attribute | S/N, Warranty |
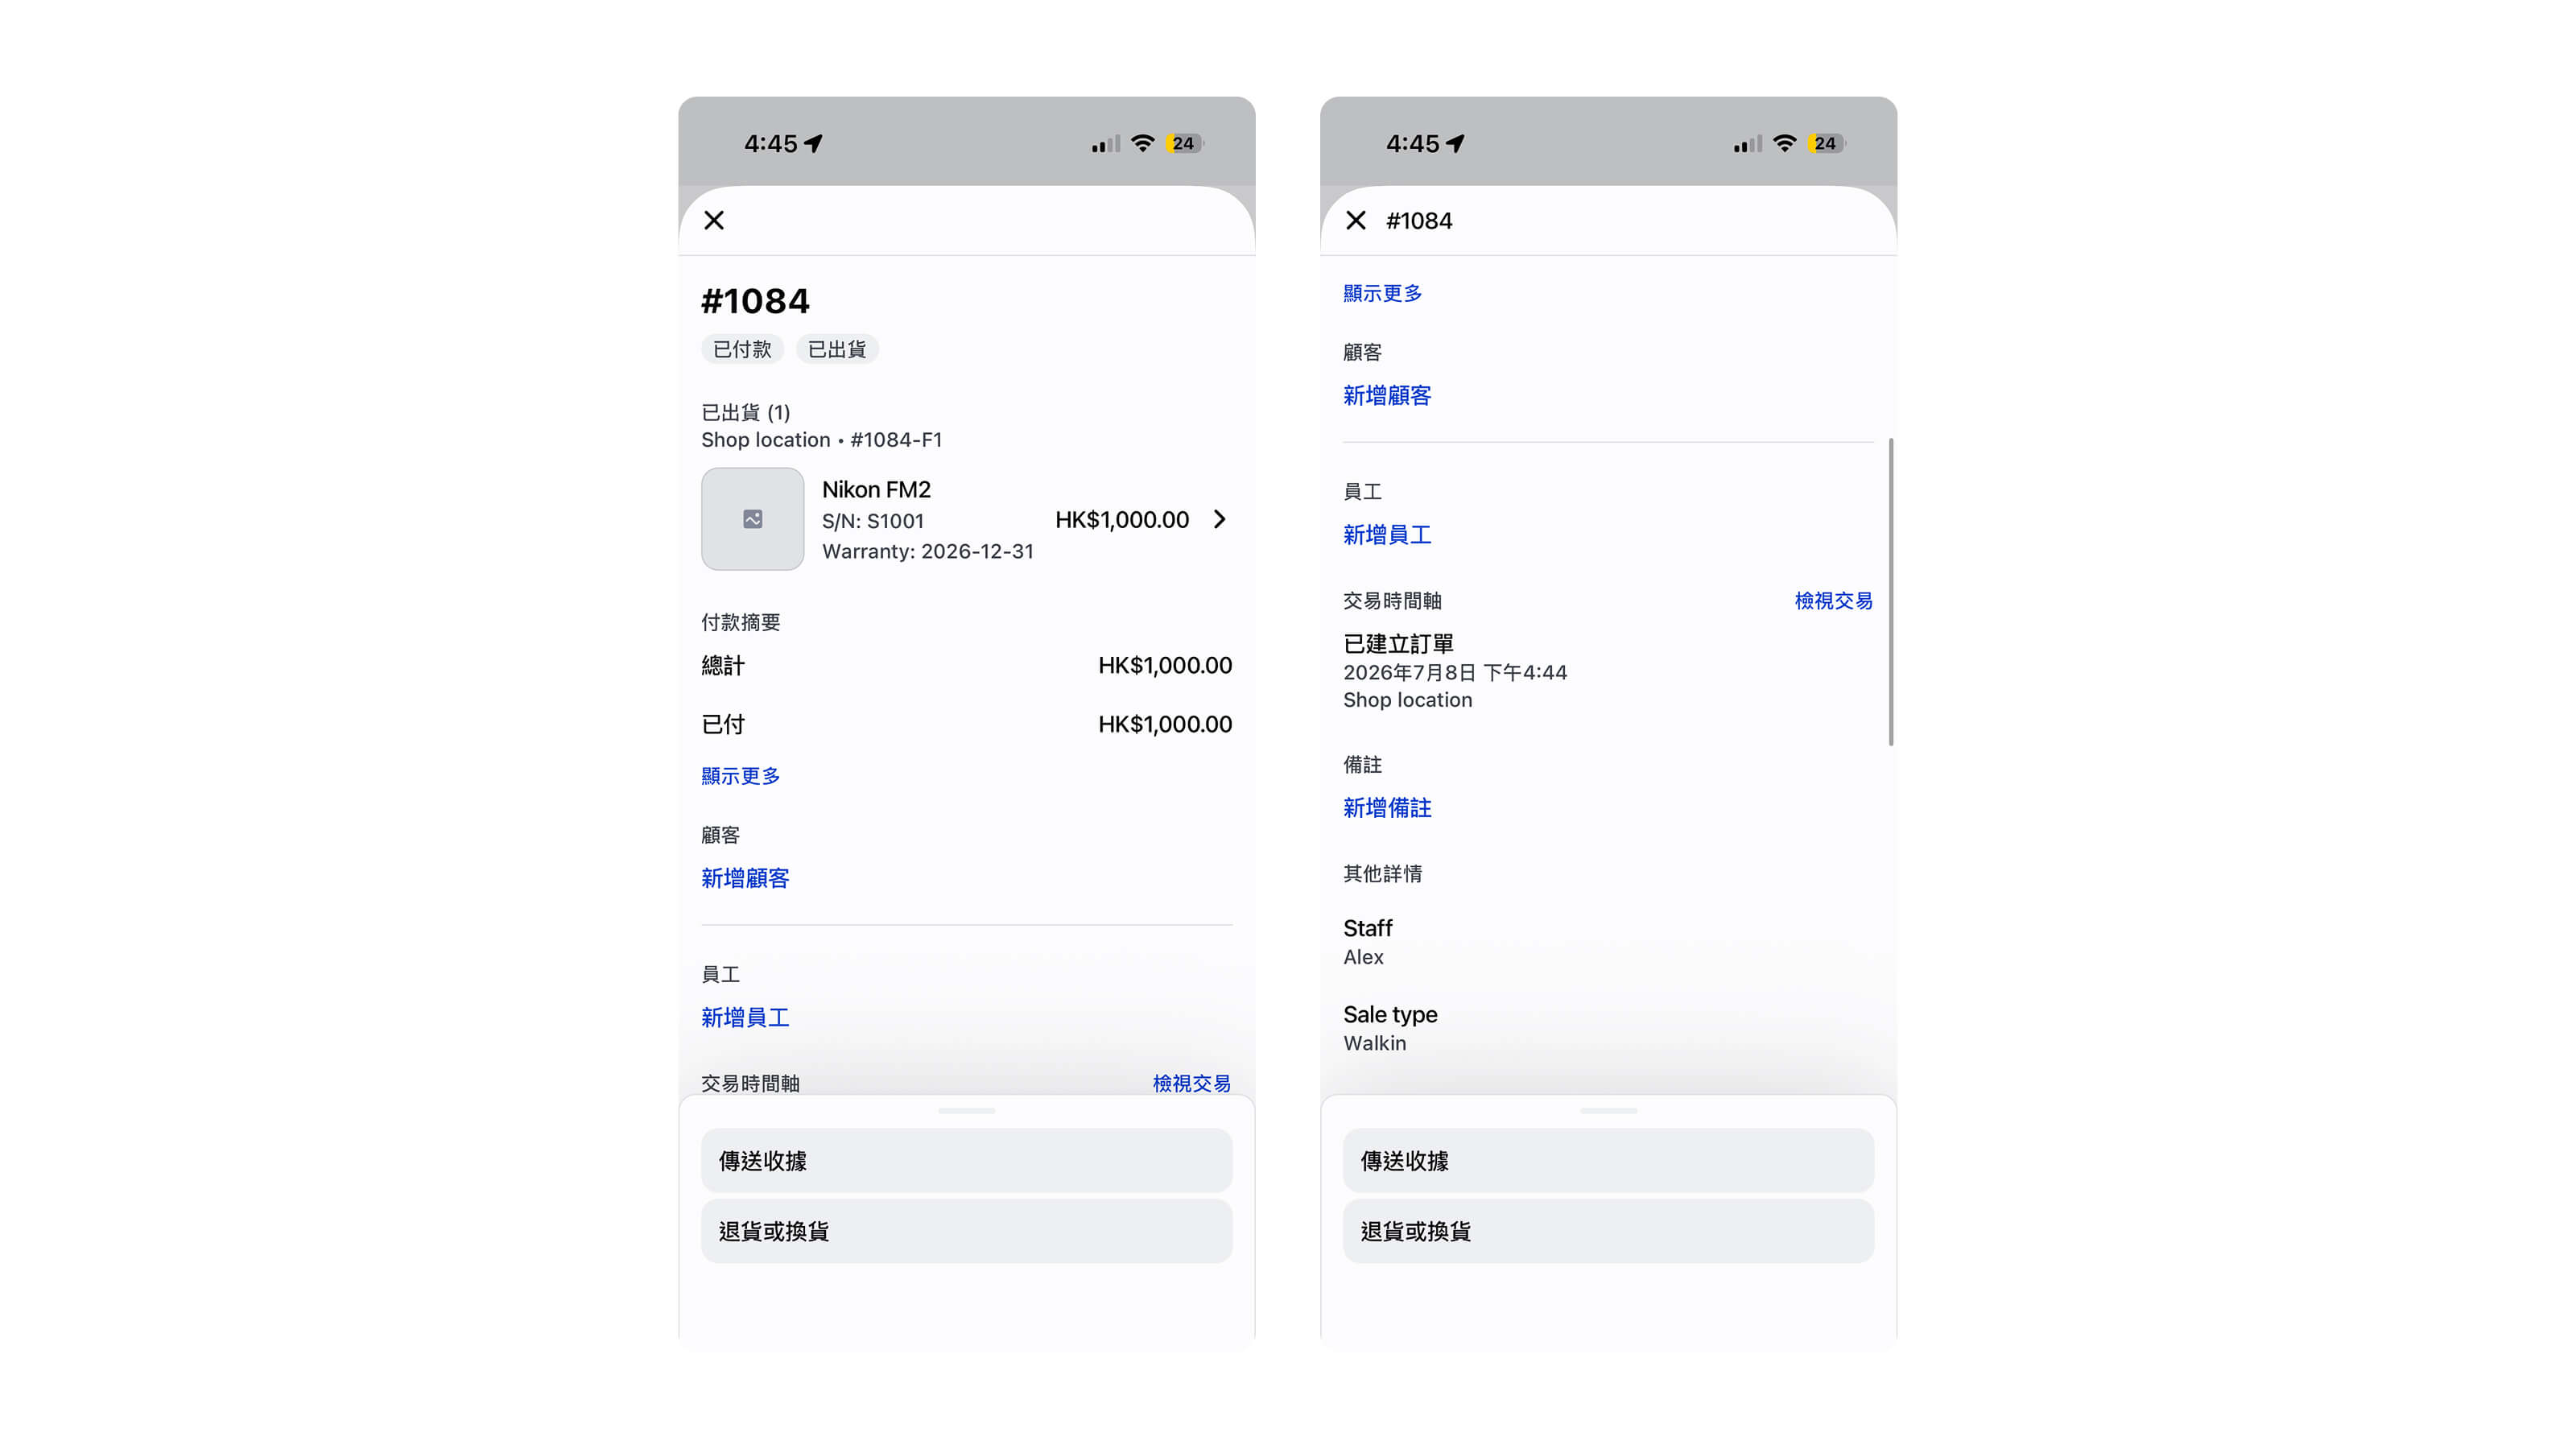
See the Staff guide for a full screenshot walkthrough (cart tile → line-item menu → verify on the order).
Quick preview:
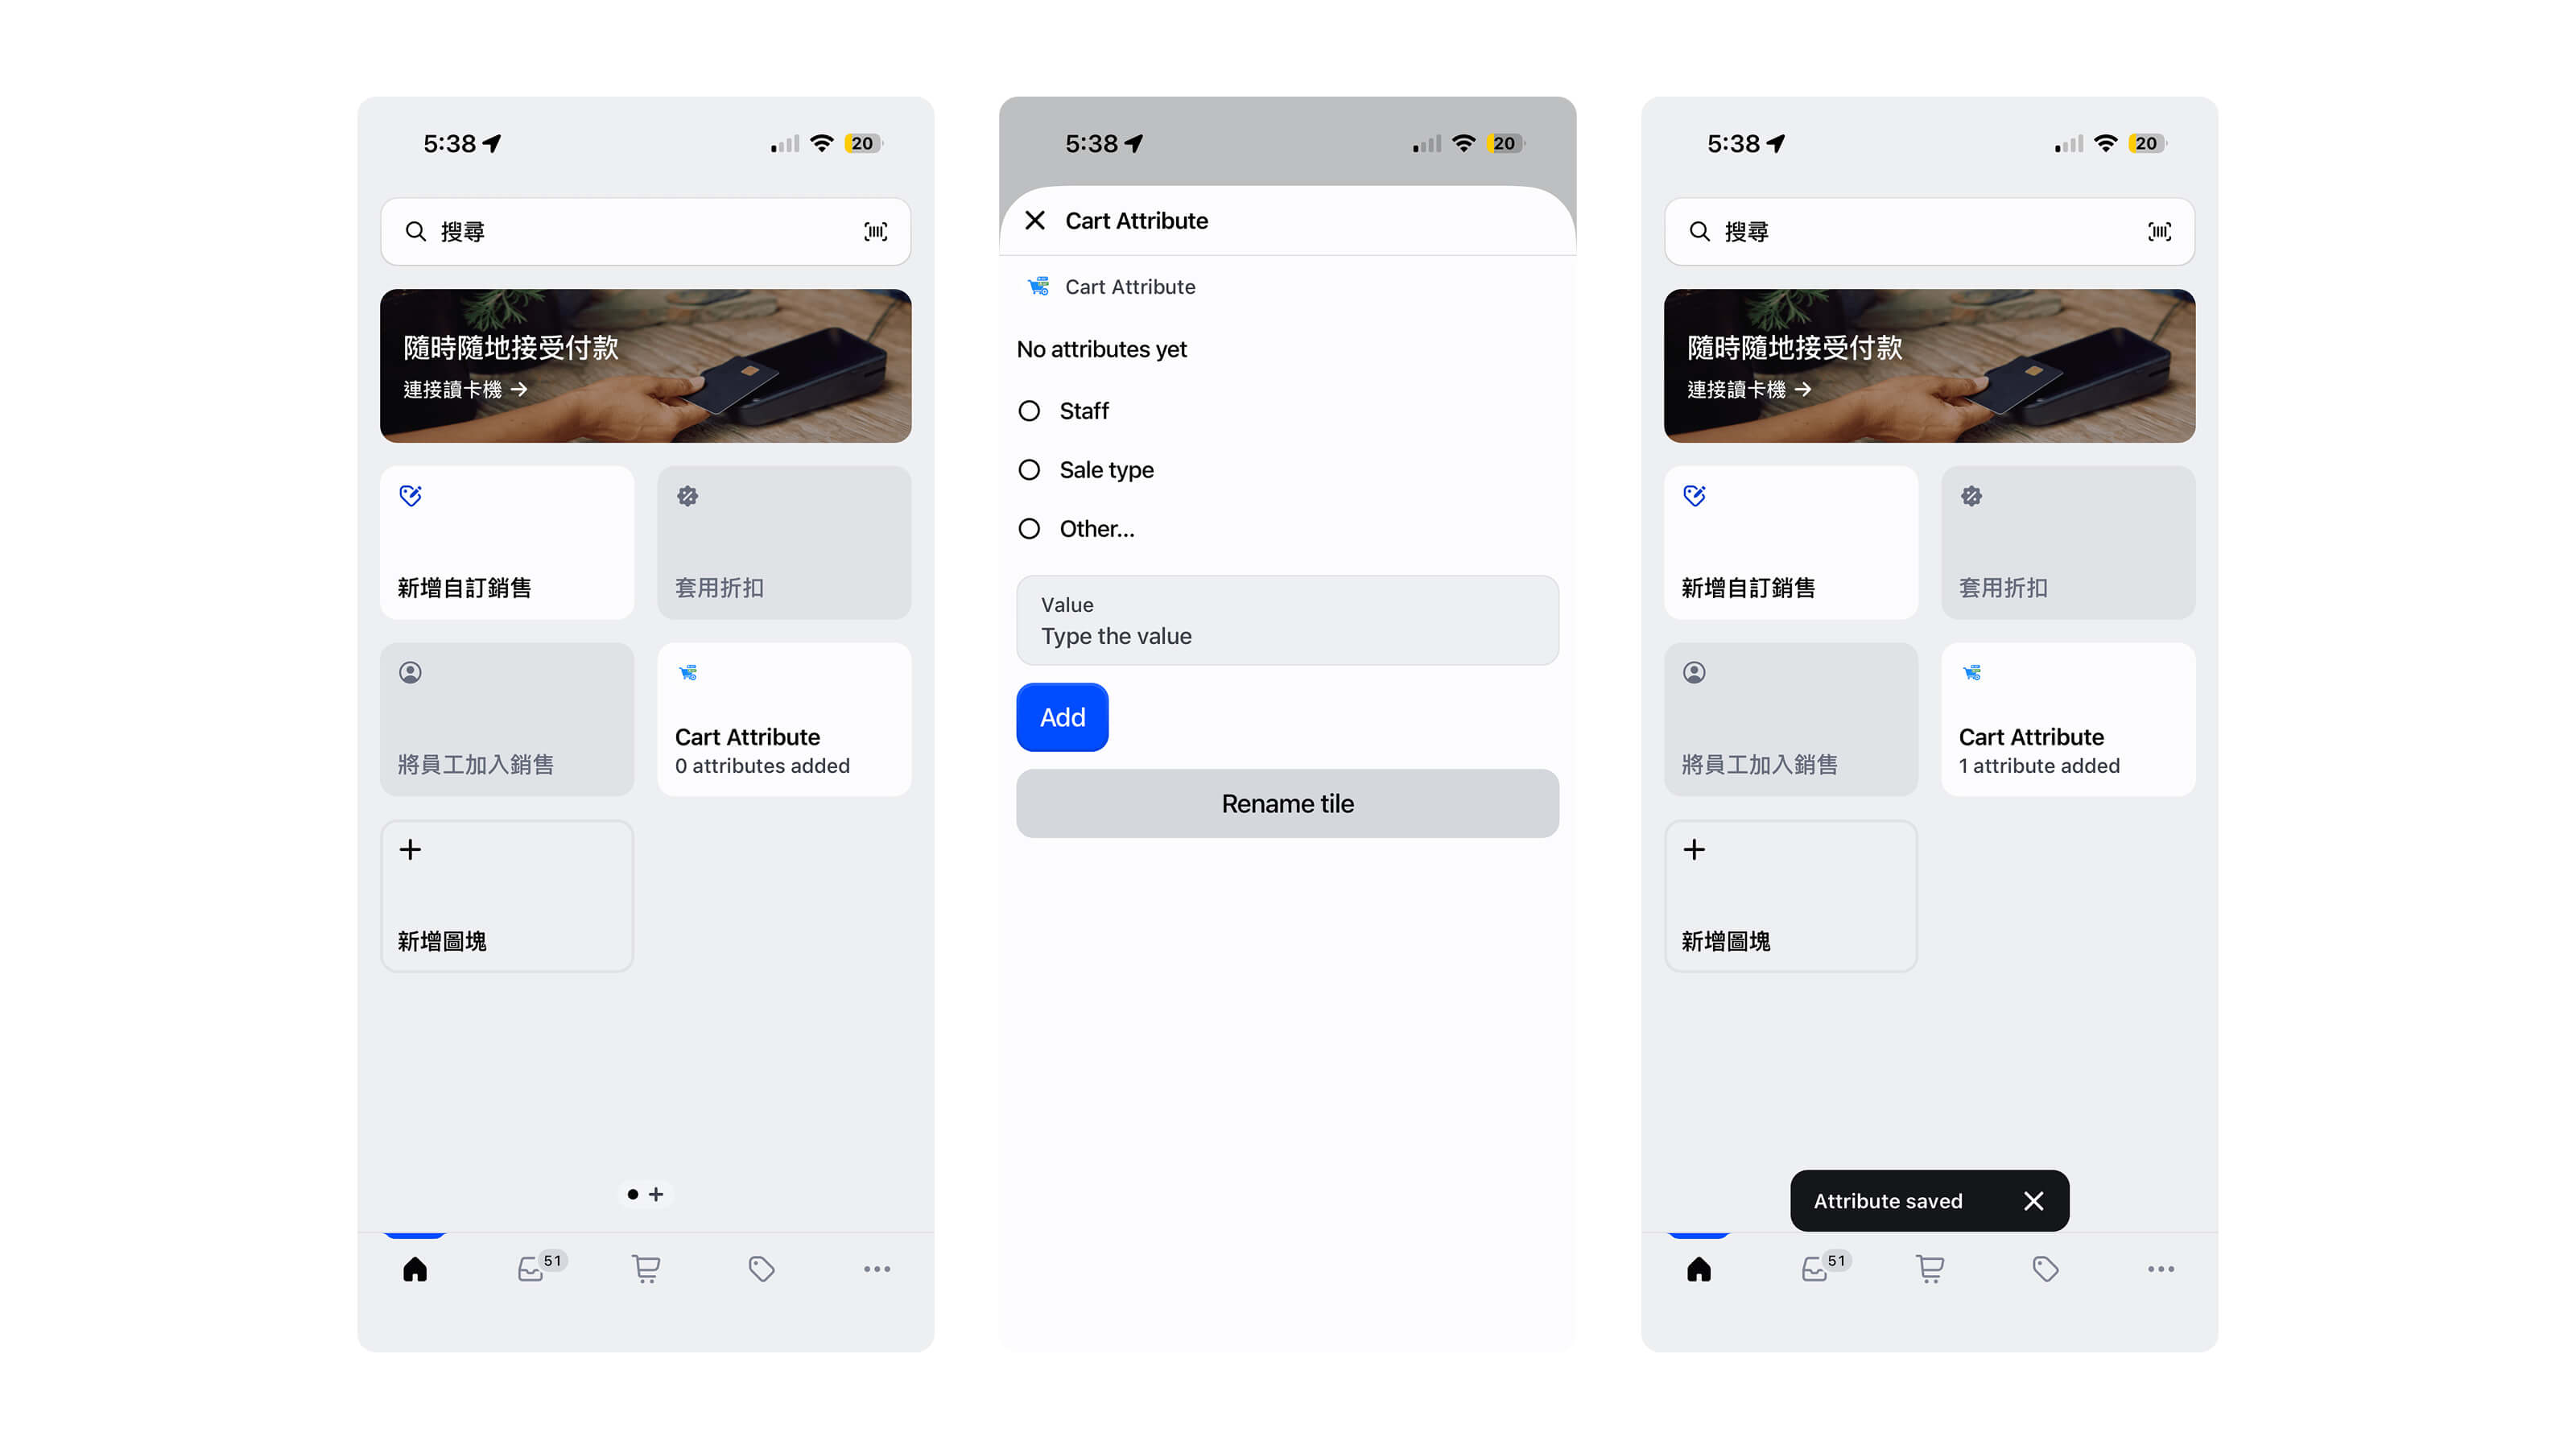
Full walkthrough
Section titled “Full walkthrough”End-to-end demo: setup, cart-level attributes on the smart-grid tile, and line-item attributes from the cart menu.
Next steps
Section titled “Next steps”- Setup guide — enable the app and add the POS tile
- Staff guide — day-to-day use on the register
- Troubleshooting — fix empty key lists or load errors
- Install POS Cart Attributes — $4/month, 7-day free trial